
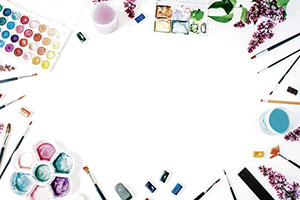
The Easter holiday means a break from homeschooling. Rather than give them over to the television, spend this break being creative with the little ones. These spring-themed crafts are fun for the whole family and will help you bond and reconnect at the same time.
Egg Carton Flowers
This craft is the perfect way to use empty egg cartons. Simply cut, paint, and glue for a lovely floral craft.
Supplies:
- acrylic paint or watercolor paint
- cardboard egg carton
- sturdy straw, paper or plastic
- pom poms
- scissors
- glue
- paintbrush
Instructions:
- First you will cut out a block of four containers from the egg carton. Trim neatly around the edges to add a rounder shape for the petals of the flower.
- Squirt small amounts of acrylic paint, in various colors, onto a paper plate for the kids to paint their flowers. Any colors will do, but pastels are recommended.
- After the paint flowers have dried, attach a straw “stem” by gluing one on the back. Sturdy straws are recommended in order to hold up the flower. Using a flimsier material, like a pipe cleaner could bend under the weight.
- For the last step, choose a colored pom pom and glue that to the center of the painted egg carton. Prepare many flowers to create a bouquet.
Stained Glass Kites
Flying kites is a great way to spend a windy afternoon. If the weather isn’t cooperating with you, try making one of these paper kites to decorate your windows instead.
Supplies:
- sheets of black construction paper
- ½-inch strips of black construction paper
- scrap pieces of black construction paper (from cutting out the kites)
- assorted colors of tissue paper – you can cut it into squares or let your kids tear pieces
- clear contact paper
- yarn or ribbon
- colored construction paper scraps
Instructions:
- Cut a kite shape from black construction paper, saving the scraps. Next, cut out the center of the kite, leaving about a 1-inch frame.
- Tape a piece of clear contact paper, sticky side up, on the table. Stick your kite onto the paper, frame-side down and create a design with black paper strips or shapes. You could do traditional cross-shape strips, or create a unique pattern for the back of your kite.
- Cut or tear colored tissue paper into small pieces. Cover the kite in colorful paper. When the kite has been completely covered with tissue paper, seal over the top of it with another piece of clear contact paper. For best results, stick the cover sheet to one end of the kite and slowly press it down over the tissue paper, smoothing out any bumps.
- Cut off extra pieces around the kite and attach a ribbon or yarn “tail” with glue or tape. Cut bow shapes out of construction paper and glue along the tail to create bows. Set aside to dry completely.
- Mount kites on a window to see the sun shine through the colors.
Via makeandtakes.com
Popsicle Stick Picket Fence
This craft is easy, inexpensive, and fun for all ages. With only five supplies, it is a quick activity to get those creative juices flowing.
Supplies:
- popsicle sticks
- glue
- white acrylic paint
- paintbrush
- various spring-themed stickers or other embellishments
Instructions:
- Begin by gluing your popsicle sticks together to create the fence base of the craft. Remember to leave a small space between the popsicle sticks, so that it has the look of a picket fence. Use four sticks vertically and place two sticks diagonally to create your fences. Set your fences aside to dry completely.
- Once they have dried, paint the fences completely white. Allow paint to dry. Finish by attaching stickers, glitter, and any other decorations that you choose.
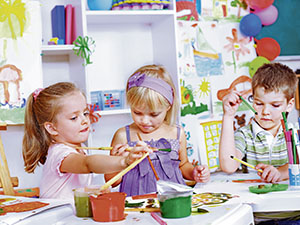
Arts and crafts are a great way to spend quality time with your children. Your kids will benefit from special time with you while improving their motor skills and using their imaginations while being creative. Once you have completed your project, stand or hang it so the whole family can marvel at your little ones’ achievements.

